Saturday, May 29, 2010

Mini Album in a Box

Warning, this post is very photo HEAVY! :)
Remember this little box from two weeks back? Well here is its all finished with the matching card. I made two of these to give as gifts to my daughter's pre-school teachers.
Here's the card. I used the same patterned paper for the card front and punched the corners with my MS corner punch. The lace is Prima and so are the little pearls on the sentiment. I inked all the edges with Tim Holtz antique paper distress ink and a little tea dye distress in on the sentiment.

Inside the box is a mini album.
I used Prima pattern papers to make the album pages because it is such a nice heavy card stock. Each little page is linked to the next with a jump ring and I added a couple of beads to them.
Each page has been embellished with either some Prima Sweet and Sassy flowers, Prima pearls, Stickles, Prima stickers or crocheted flowers.
I am in the process of making a video for this project, but I came down with a cold and haven't been able to finish filming it all yet. I'll post it as soon as I do.

Thursday, May 27, 2010

Lily-Boo and May Swap Too

Here's a card I made for a friend on the Paper Crafting Mania Forum. Over there we had a card swap and this is the card I made to give to my swap partner:
The butterfly image is a digi from Lily-Boo's Boutique. I colored it with my Touch markers and added just a little bit of Stickles for hints of sparkle. I cut out my colored image and mounted on top of some purple eyelash fibers. The card stock was embossed with a Sizzix EF and the butterfly ribbon was from my stash. I sprayed the card stock all over with some glimmer mist too (it just goes with everything)

Sunday, May 23, 2010

Now We're Cookin'

I was busy getting my garden planted yesterday:
It's not much, but we don't have room here for the size garden I'd really like to have.
These are my herbs; Parsley, Chives Oregano and Basil

And these are the peppers; Jalapeno, Hungarian hots and Sweet banana.
I also have a Roma tomato and cherry tomato plants.
So while I was planting my garden , my hubby decided to go shopping and he came home with this :
A new grill! We really were overdue for a new one and the previous grill was kinda rinky-dink and well, crappy, overall. It was all or nothing with the flame, which took a great deal of skill to keep from burning everything to a crisp. I'm so excited about the new one and did you notice it's BLUE (my favorite color) Kevin knows me so well! He did an awesome job picking one out, considering he doesn't cook hardly ever (which I don't mind cuz I love to cook)

Here's our first meal I prepared on it : Grilled Chicken quarters. Nothing special, just what we had in the fridge :) But oh it cooked them like a dream. Am I totally crazy that I get so excited about an appliance?


Thursday, May 20, 2010

LIVE with Prima Class Tonight

I just get so excited for LIVE with Prima class days :)
On tonight's class Marion Smith is going to be making an altered wood crate and mini book.

Let me tell you this kit is PACKED with flowers! We've got it in stock at Your Memories Here and don't worry if we sell out (cuz this is going to be fabulous) we'll get more!
I hope to see you tonight 6:30 PST or 9:30 EDT at livewithprima.com
Be sure to sign in and say "hi" my Ustream name is I_SKRAP (that's my licence plate# too, pretty cool huh?) When you join in the live chat you automatically have a chance at winning a prize!!!

Saturday, May 15, 2010

A Peek at a Project

Hope everyone is having a great weekend, I'm off on another 4-wheelin adventure on a hill side in Pennsylvania today! But you didn't come to hear about my ATV escapades, right?
I'm working on a project for my daughter's teachers and it's not finished yet but I thought I'd share a peek with you of the part that is complete.
This is a little paper mache box with a lid
Oval Album Box
I covered the box with patterned paper and then sealed the whole thing with Mod Podge. I added some Prima lace (Madeline) around the band of the the lid. And gave it a light antique color by rubbing a little antique linen distress ink over the lace with a sponge applicator.
Lid to Album Box
The lid is embellished with some Prima flowers that actually come in white but I hand painted them all to match! There are also Prima leaves and the Prima pearls on there. I stamped a little sentiment that reads: "tell your story" with some Stazon timber brown ink.
There's going to be something included inside the box as part of the gift, but you'll have to wait and see what that is ;)
I'm also going to be making a video on how to create this project, but one thing at a time, I've got to get them done before the last day of school (May 26th!)

Tuesday, May 11, 2010

I Was Chosen, YAY!


If you click on the image you can read it better.
I am so honored Audrey and her fairies chose my entry to be one of the 5 chosen. Visit Audrey's blog, Cute and Some to see what this contributor's showcase is all about

Saturday, May 8, 2010

Canvas Art

I made these canvases for my daughters' bedrooms (each personalized with her name on it)

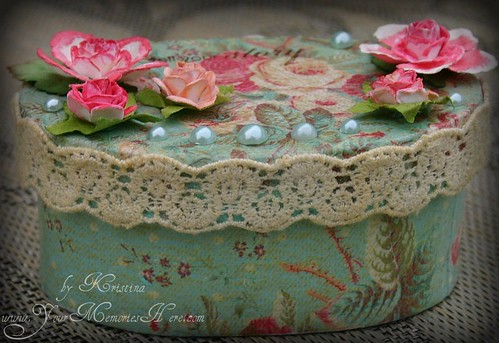
I got my inspiration from Julie Fei-Fan Balzer's Live with Prima class on April 19th. (you can watch the recorded class at livewithprima.com) First step is to paint a back ground color(s) on the canvas (I used an 8"x10" canvas that I got at Hobby Lobby for about $3 for a pack of 2) I painted this one with a light blue acrylic and a medium pearl blue acrylic. Let it dry and in the mean time take some patterned paper and tear it into strips and pieces (I used Prima Shabby Chic collection papers for both canvases) When the paint is dry, apply Mod Podge to the pieces of papers and a glue them down to the canvas leaving a little space in between to show the background color (kinda like tile grout) When the Mod Podge dried I then sprayed overall with some Tattered Angels Glimmer Mist (for this one I used Piece of Heart because of the turquoise/aqua blue color) Again, let dry. Now you're ready to embellish. I added some Prima lace that I had sprayed with Glimmer Mist (sunshine) to give it a shimmery gold color.

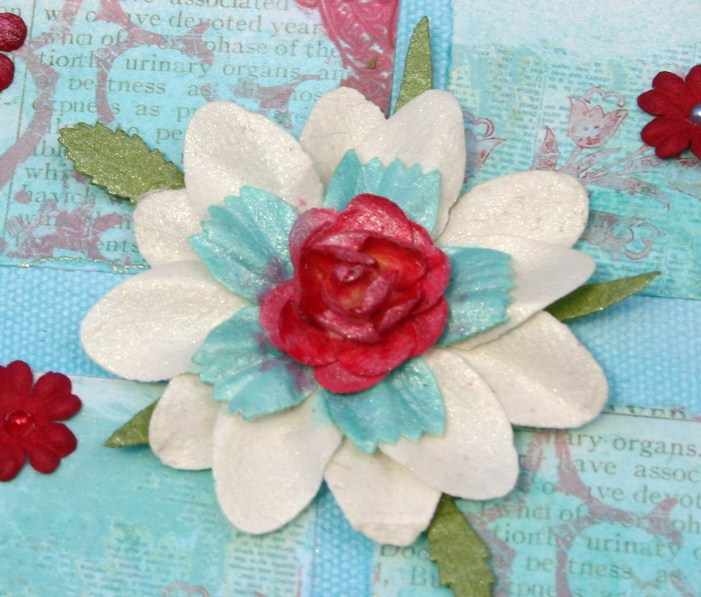
I also used Prima flowers (the large white one was colored with more Glimmer Mist (piece of heart and tutti fruiti) applied with a paintbrush for a more concentrated color and finally sprayed all over with dazzling diamonds GM.

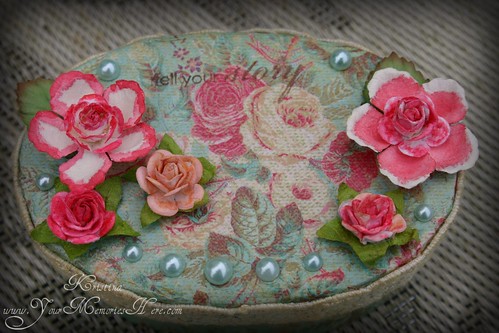
This cluster of flowers is from the Prima Spice Rack collection. The larger daisies were red and I sponged a little white ink on them to give them a shabby chic look to match the papers I used. The leaves are Prima rose leaves.

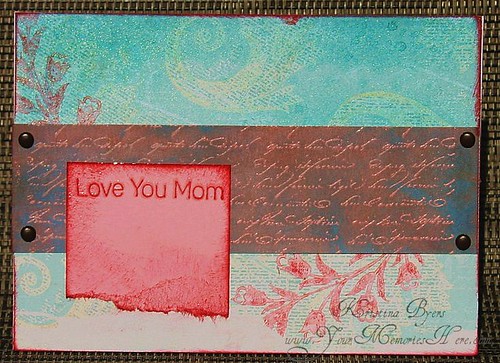
The butterflies were fussy cut from the paper and i only glued them down in the middles of their tiny bodies so that I could bend up the wings for more dimension.

The letter's of their names are chipboard that I covered in more of the Prima Shabby Chic paper. I sanded the edges of each one and then inked them (these ones in white).

For Marlee's canvas I followed the same steps, this time using purple acrylic paint as my base color, spraying with tutti fruiti Glimmer Mist and the flowers on hers are Prima E line white flowers that I colored with Glimmer Mist again using the brush on technique (tutti fruiti and popsicle) The large flower is a Prima Wrinkle Rose (lightly misted with tutti fruiti GM) The tiny little purple roses are from the mini rose bouquets. The lace on this one is also made by Prima, that I Glimmer Misted. The chipboard letters were sanded and inked with purple.

Marlee's canvas seems to be a bit of pink and purple overkill, but those are her favorite colors and she wouldn't have it any other way. After all, I made these for them and their rooms.

Wednesday, May 5, 2010

Mother's Day Card


moms day 101, originally uploaded by kbyers1903.

This is the card I made for my Mom this year. She usually doesn't read my blog until the week end so I should be safe, and she won't see here before she sees it in person.
I used a Page Maps sketch (from November of 2005) for the layout of this card. The background paper is Prima, from the Shabby Chic collection. I gave it a little spritz of Tattered Angels Glimmer Mist, in Piece of Heart. The script strip in the middle is actually a background stamp that I stamped on pink paper, then clear embossed and finally rubbed ink all over to give it a vintage-y /grunge-y sort of look. This is so far from my normal style but I thought I'd give some new things a try. It never hurts to mix things up now and then and get out of your comfort zone.

Saturday, May 1, 2010

Lily-Boo's May Challenge

Hi everyone! It's May and that means another challenge is up at Lily-Boo Too challenge blog. The challenge this month is to make a card any shape but a rectangle or square. I know some of you make shaped cards often but this is a rarity for me.
yarn
For my card I used one of the cat images from Lily-Boo's Boutique. He looks quite happy with his giant ball of yarn. I used my Sweet Treats Cricut cartridge to cut the shape of the card. I know wild card is an obvious choice for shaped cards, but they are all themed and I wanted a clean slate to work with. I cut our my image after I colored it using my scalloped edge scissors. The I inked those edges and after I glued it down to my base I added an iridescent glittered embossing powder to make it pop even more. I wrote the words "HAVE A BALL" with my Ranger perfect medium pen and then added aqua embossing powder to it.
The inside of the card is lined with circles that are shaped like gears that I cut with my Cricut using SCAL (I wanted to use scallops but thought they were a little feminine) one larger then the card to peek out when you look at the front and one smaller to fit inside.

I used the colors aqua, red and white for the color challenge on PCM (I knew I could find that paper;))
This is a birthday card for my Dad who happens to be a cat lover, but don't tell him, his birthday isn't till the 20th.
This card also qualifies for the following challenges:
Cupcake Craft - Don't be square
CRAFT - challenge 48
Maljen's- #5 challenge
Penny's Challenges - #28 challenge